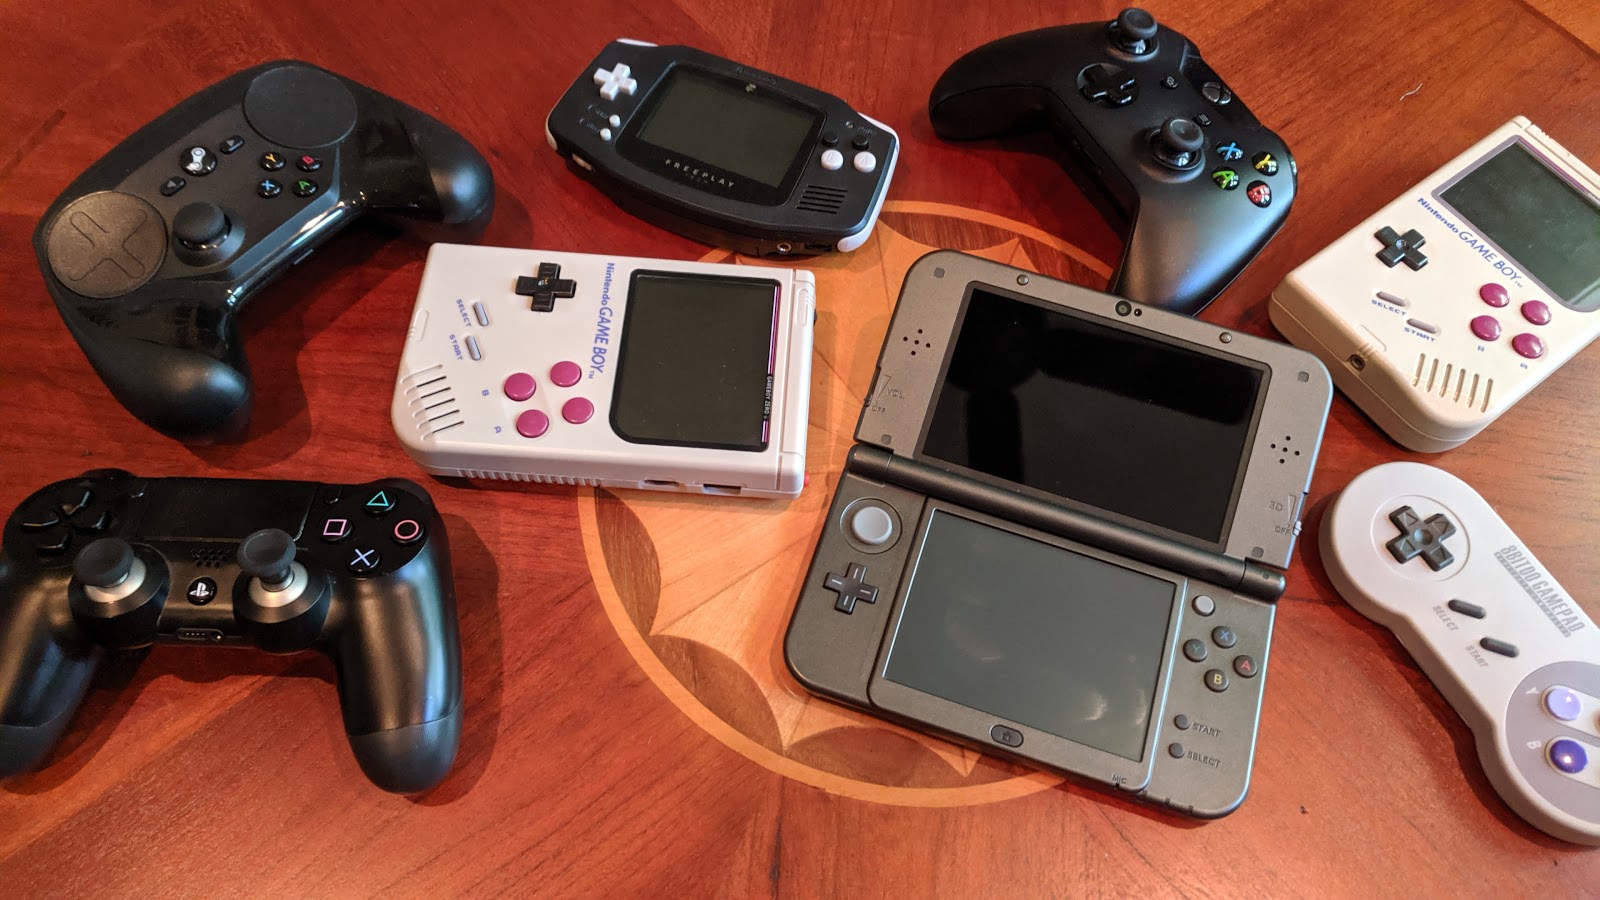
I enjoy putzing around with homebrew / homemade handheld gaming devices. I’ve built Raspberry Pi Zero systems inside a classic Gameboy shell. I’ve pieced together a Freeplay Zero in a Gameboy Advance shell. And I’ve purchased a premade Anbernic RG-350 straight from China. They all have their pros & cons. I just wanted to summarize some of my experiences here.
Classic Gameboy DMG-01 powered by Raspberry Pi Zero
Pros:
- Good chance to learn some basic electronics skills
- With enough imagination & Google-fu, you can include just about any features you want
- Robust community around this type of project
Cons:
- With any version of RetroPie released since about 2017, the Raspberry Pi Zero isn’t quite powerful enough to run many Super Nintendo & Gameboy Advance games at full speed. A Raspberry Pi3-based handheld can run nearly all of these games at full speed (in addition to many N64 or Playstation games), but they typically cost over $200, and require big batteries & some sort of cooling solution
- Can be more expensive than you expect (my first Pi Zero cost about $250 to build; my last around $125)
- Stuff like this that you make from scratch has a tendency to fall apart with extended usage
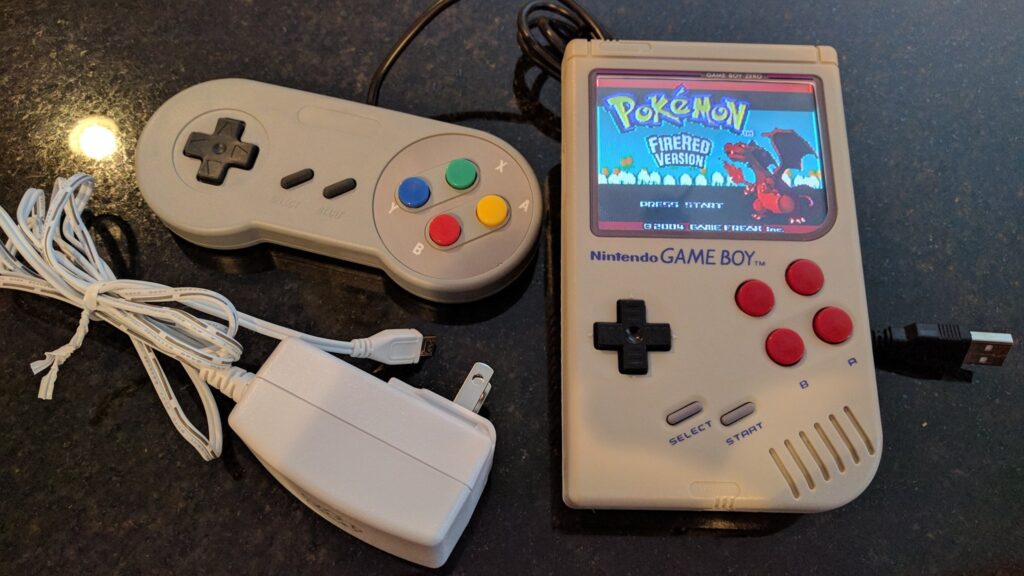
This was my first foray into handheld emulator devices; and really my first experience with soldering using bare resistors, capacitors, and the like. The Sudomod forums, run by wermy, were vital in this entire process. I got to learn some extremely basic electronics skills while the homebrew Gameboy emulator community grew and matured into what it is now.
The basic idea behind these is: you take an aftermarket Gameboy shell, Dremel away some pieces so you can fit a 3.5-inch LCD & more buttons, and power the whole thing with a Raspberry Pi running RetroPie & various electronic components for sound, power, etc. Then you can use it to play any of the classic Super Nintendo, Gameboy Advance, and older games you can get your hands on. (For games that you legally own. Of course.)
When I built my first two systems, everything was pieced together with individual wires, resistors, and capacitors.
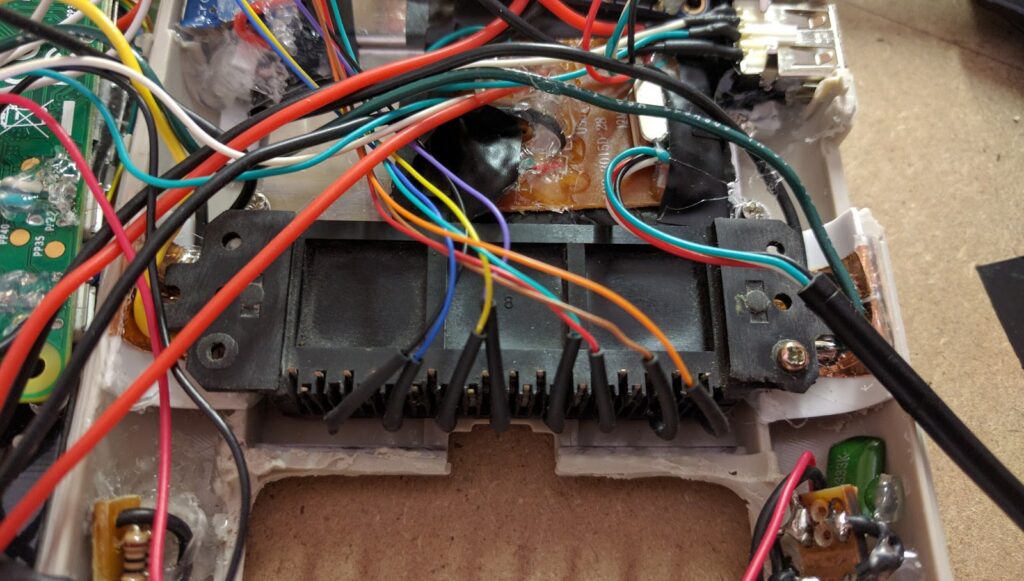
The final products were a tangled rat’s nest that I could barely squeeze the shell around, and the rear trigger buttons weren’t terribly reliable. The first of these systems no longer actually functions, and I should probably dismantle it before the battery explodes or something. The second was gifted to friend, as as far as I know, is still playable.
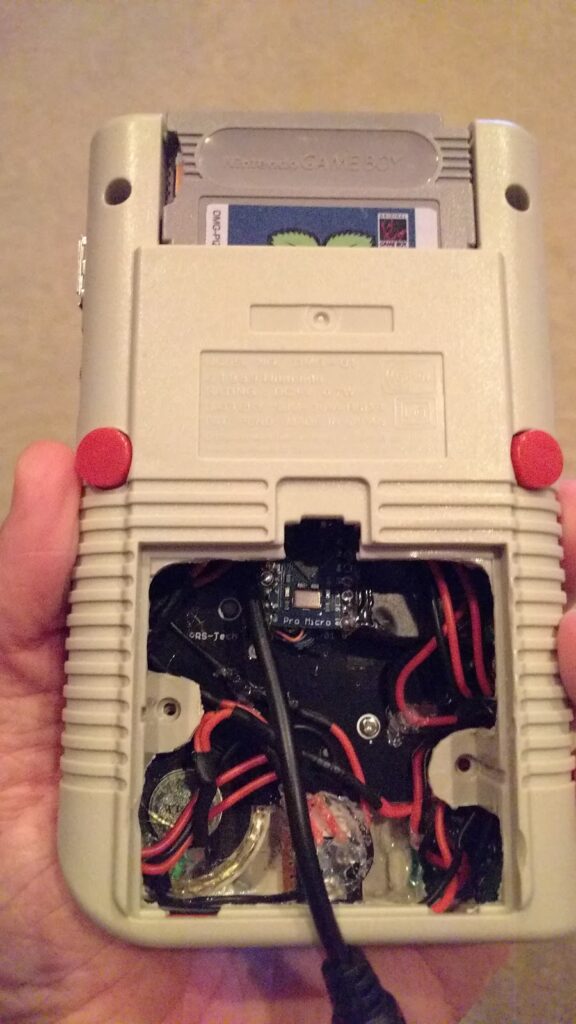
By the time I built my third system, there were cheap & efficient premade boards that I could basically just solder onto a Raspberry Pi Zero, slap into a modded Gameboy shell, and call it good. A lot of design issues like flaky trigger buttons had already been worked out by this time. I used a GPIO Assist Ultra kit from Pocket Adventures. This has a USB hub, USB soundcard/amp, battery monitoring, and safe power-off switch all built-in. These were all components that I previously had to cobble together with varying levels of success.
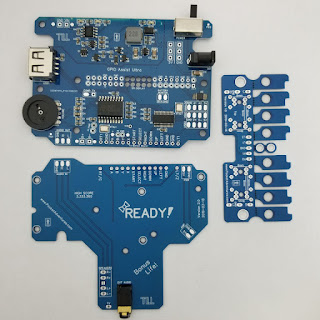
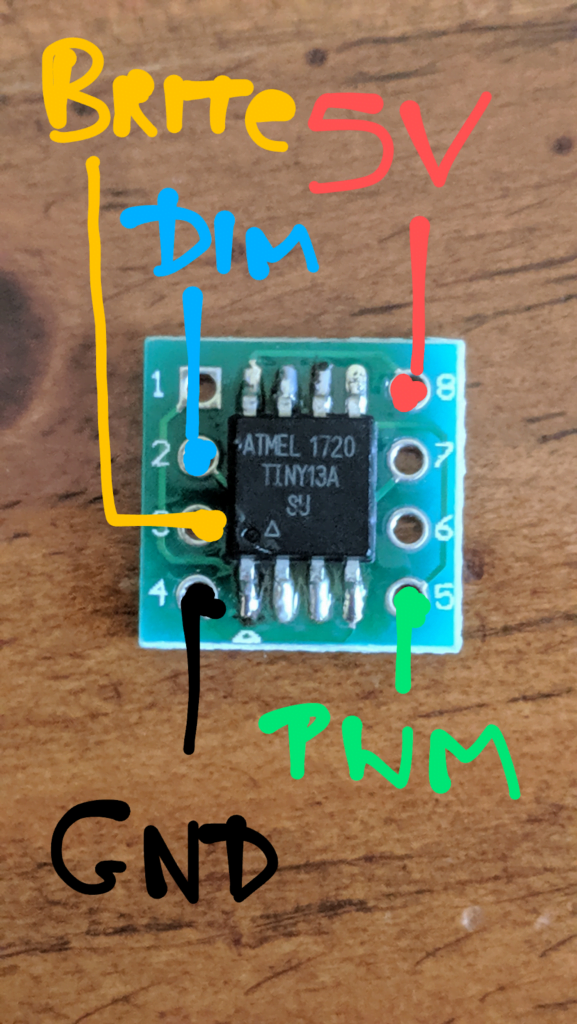
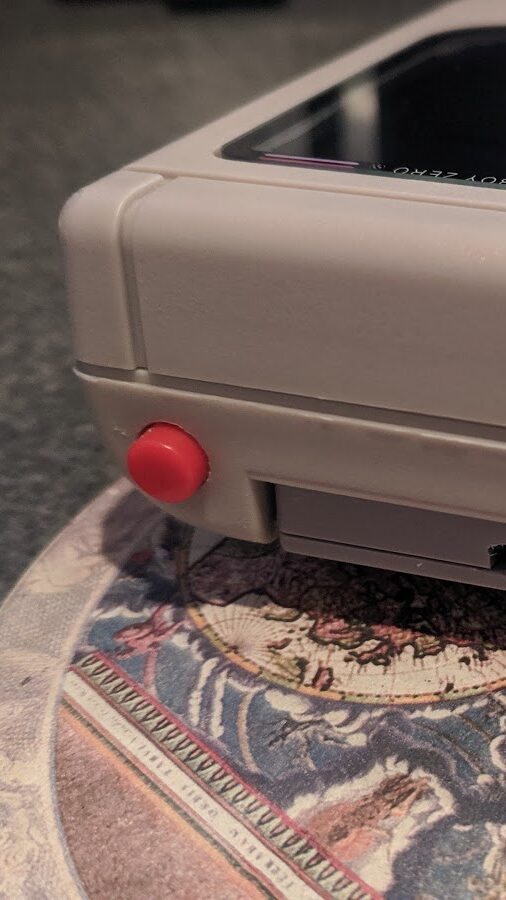
Despite requiring very little hacking to assemble, I still managed to screw this kit up quite a bit before finally getting it working. I had some bad solder joints between the GPIO Assist & the Pi Zero which caused odd, intermittent sound & power issues. Once that was worked out (and after repairing the physical damage I did to the board with my bad soldering), I was able to add a few custom touches, like a separate hotkey button for administrative functions and a PWM screen dimmer using an ATTiny chip running Arduino.
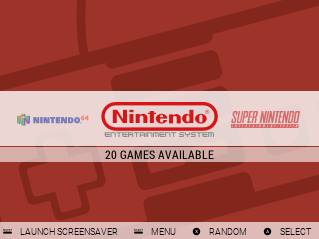
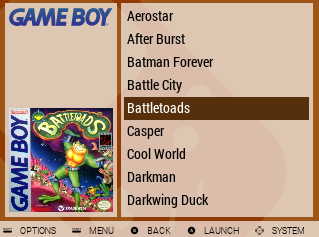
In the early days of RetroPie handhelds, there weren’t many good themes that were viewable on a 3.5-inch screen. So, I made the GBZ35 themes, which seem to be fairly well-used on RetroPie handhelds, so that’s kinda cool (though, with user-friendly options like the Retroflag RPi making this hobby more popular, there are now much fancier options becoming available).
Freeplay Zero by FreeplayTech
Pros:
- You can build these with ZERO soldering (you’ll still need to do some modifications on an aftermarket Gameboy Advance shell)
- Many people prefer the Gameboy Advance form-factor, particularly with its less fiddly solutions for the L & R shoulder buttons (vs. the traditional Gameboy)
- The GPIO-based screen (instead of composite-based like my Gameboy builds) is very crisp & clear
- A prebuilt SD card image from the manufacturer saves you from some of the more fiddly configuration you’d have to do on more-DIY kits
Cons:
- The Pi Zero still suffers from slowdown on SNES and newer; and with the more CPU-intensive type of screen used, you can also see screen diagonal tearing. (Buying the Freeplay CM3 fixes most of these issues, but costs an additional $100)
- Smaller screen than the 3.5″ LCD you can fit in an original Gameboy
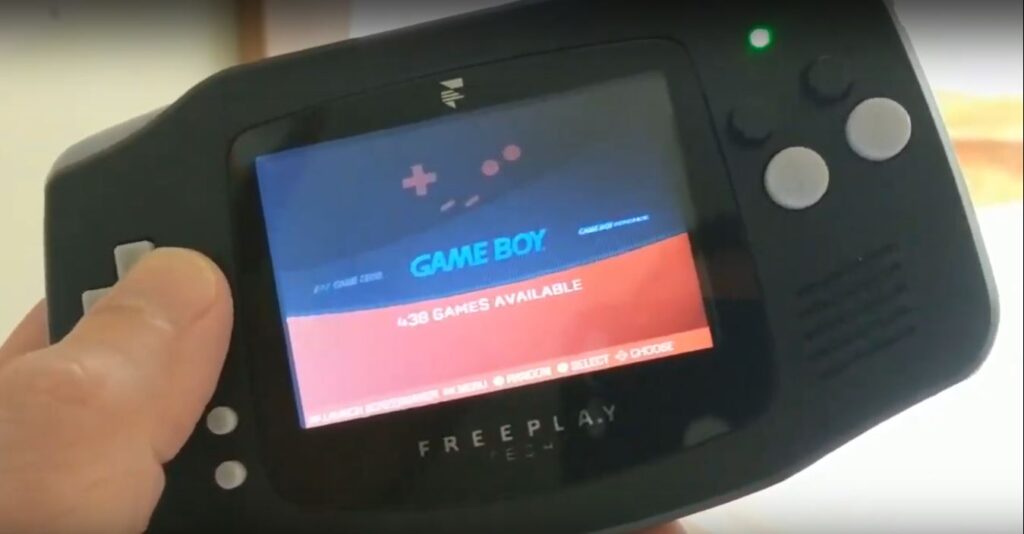
After my GBZ35 RetroPie theme became fairly widespread, I was contacted by Ed Mandy from FreeplayTech to create a RetroPie theme that he could preload onto his systems. In return, I got a prototype Freeplay Zero kit to tinker with. I’d say that was a fair trade.
Setting up a Freeplay handheld is fairly straightforward. Buy the kit and a Gameboy Advance shell, cut away some pieces from the shell, and put it all together. No soldering necessary (provided you use a Raspberry Pi Zero WH and not a Pi Zero W).
It’s a really nice unit that’s fun to play; and newer iterations have made the buttons a lot nicer to use than the original clunky X & Y buttons were. However, it still runs RetroPie, and suffers some of the performance issues inherent with that platform (if you’re using a Pi Zero instead of the Pi CM3, SNES & Gameboy Advance games struggle to keep up).
Anbernic RG-350
Pros:
- Plays almost all SNES & Gameboy Advance games at full speed. Can even play most PlayStation games at full speed
- Really well-designed device with great controls and a great screen
- Potential to see even better performance & more features with software updates (which may or may not actually come to fruition)
- Cheaper & faster than most Raspberry Pi options (similar price as the Retroflag RPi, but better performance, features & build quality)
Cons:
- Buying from Anbernic’s AliExpress storefront in China takes a couple weeks or more to ship, though you can pay a hefty premium to quickly get one from Amazon.
- Cheap Chinese ElectronicsTM like this can be a bit of a crapshoot. Some advertised features simply aren’t here (e.g. HDMI audio/video output), and hardware longevity may not be the best (too early to know for sure, though I’ve seen occasional funkiness with my unit’s display).
- Still a fairly techy device, and is not particularly user-friendly if you’re just expecting to take it out of the box and play.
- The development community is a bit disorganized, and is split into multiple groups unwilling to work with each other. It’s hard to find the newest & best software you should use on these units.
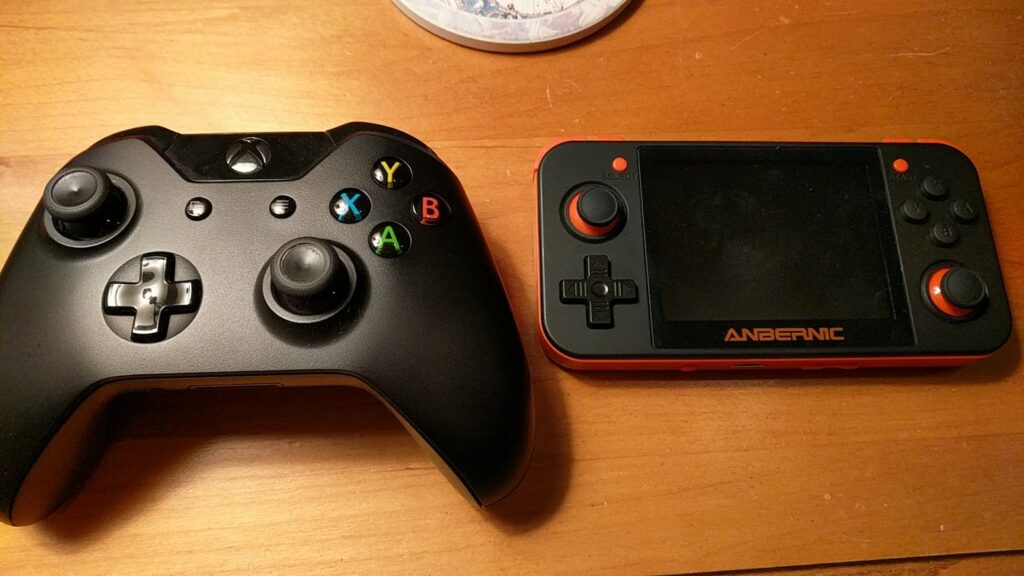
I’ve been using the RG-350 (Xbox One controller shown for scale) for a couple weeks now, and it’s really a joy to play games on. It’s technically based on a several-years-old device (the GCW-Zero), but software development has recently gotten a jumpstart due to the RG-350 & similar devices released around the same timeframe.
Unlike the Pi Zero, it plays SNES & Gameboy Advance games almost universally at full speed (in part because older, faster, but technically less “accurate” emulators still work on this device). It even plays most PlayStation games at full speed; and even has all the features of a DualShock controller (including rumble).
Software development is a bit fractured, with some people separately developing on the Dingoonity Forums and others on Discord. However, there is hope that further software development could someday bring things like improved performance and actual delivery of some of the advertised features like HDMI output.
Here’s a wiki to help with some of the setup & configuration on the RG-350.
Hello sir, is your gbz35-dark theme usable on ES on the rg350? Waiting on my unit and that theme is my go to on everything else. Thanks!
Honestly, that's a good question. Unfortunately, I don't know the answer. I've heard that EmulationStation on the RG350 is a bit slow, so I never installed it.
Anyhow, I would think it would work, since the theme was originally designed to work on RetroPie in late 2016, but can't say 100% for sure.
I've actually learned that the GBZ35 themes are, in fact, compatible with the RG350 units. I'm told you just have to use an older version. I've forked off what I'm told are the compatible versions of the themes here:
GBZ35
GBZ35-Dark